
How to respray your car
There a number of reasons for respraying your car, including:
– To cover-up dings and scratches
– To add a design to the bodywork so your car stands out from the crowd
– To change the whole color
– To update an old/vintage car
– To boost appearance to make selling easier
Respraying DIY – step by step guide:
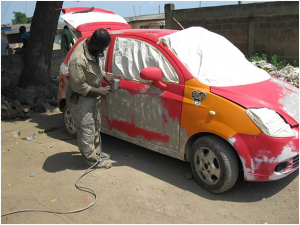
1. Preparation
This makes up about two-thirds of the entire job.
To begin with, you will need to deal with any defects, dents, bumps, or chips. You can then begin preparing the area(s) that you want to work on by washing with a cleaning solution that doesn’t contain wax.

There are two main methods for preparing the surface of a car before painting: sanding, and cutting. Sanding is the quickest way (using a sander, not sandpaper) whilst cutting relies on using an abrasive substance/compound to remove each thin layer of paint.
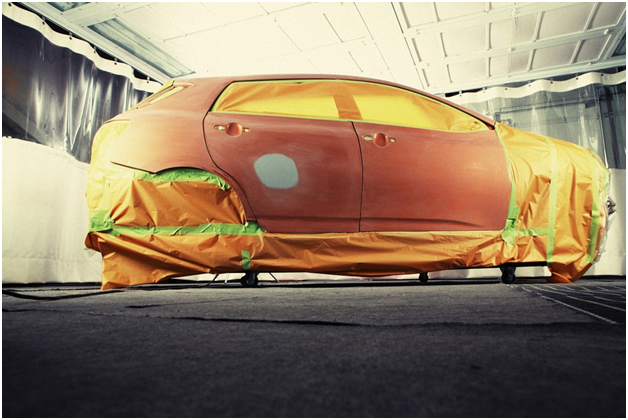
2. Masking
It is important to cover up the areas of the car that you do not intend to paint. If you are respraying the whole car, you will need to make sure you cover the windows, headlights, door handles, etc.
3. Priming
If you intend to remove the paint all the way down to the metal, you will need to add a primer before carrying out the respray.
4. Spraying
This is possibly the most tricky part of the job – and it is crucial to avoid any mistakes. You should try to lay down a thin layer each time you spray – not cover the whole thing in one go. You will need to leave a minimum of one hour drying time between each coat you apply.
What’s the alternative to DIY?
If you do not feel comfortable doing it yourself, the safest and most hassle-free option is to take your car to a specialist garage for a professional repaint that will be carried out in a purpose-built car spray booth using appropriate spray booth filters. You can find out more about spray booth filters by looking at the website of an expert.
5. Applying lacquer
Unless aiming for a matte finish, you will also need to add a lacquer coat to finish – usually one or two thin layers. You should then leave a minimum of 48-72 hours before adding a final wax.